

Sommarkoftan 2023 PART: 1 (english)
Hello and Welcome! Today is the starting day for Sommarkoftan 2023. Download pattern here. We begin with the pattern-knitted body and sleeves – because the sweater is worked from the bottom up.
Before you begin, you should have knitted a gauge swatch to make sure that your gauge matches that given in the pattern. You should also have measured yourself and chosen your size. Have you done both of these? Good – you’re ready to go!
If you haven’t done your “homework,” here are some tips to help:
Tips for knitting a gauge swatch:
Is the number of stitches/rows too few? Try going down a U. S. needle size or 0.5 mm.
Is the number of stitches/rows too many? Try going up a U. S. needle size or 0.5 mm.
Tips for choosing your size:
The measurements listed in the pattern are the measurements of the finished garment. You should also consider how much ease you want. If you want a more loosely fitting cardigan, it should be 2-4 in / 5-10 cm more than your chest measurement. If you want a more fitted sweater, choose a garment chest size matching your own chest measurement or a size an inch or so / a few centimeters smaller than your actual measurement.
CASTING ON
The stitches are cast on with the classic long-tail cast-on method, the technique you probably learned in knitting class.
RIBBING
As noted in the pattern, the ribbing is worked back and forth.
KNITTING IN THE ROUND
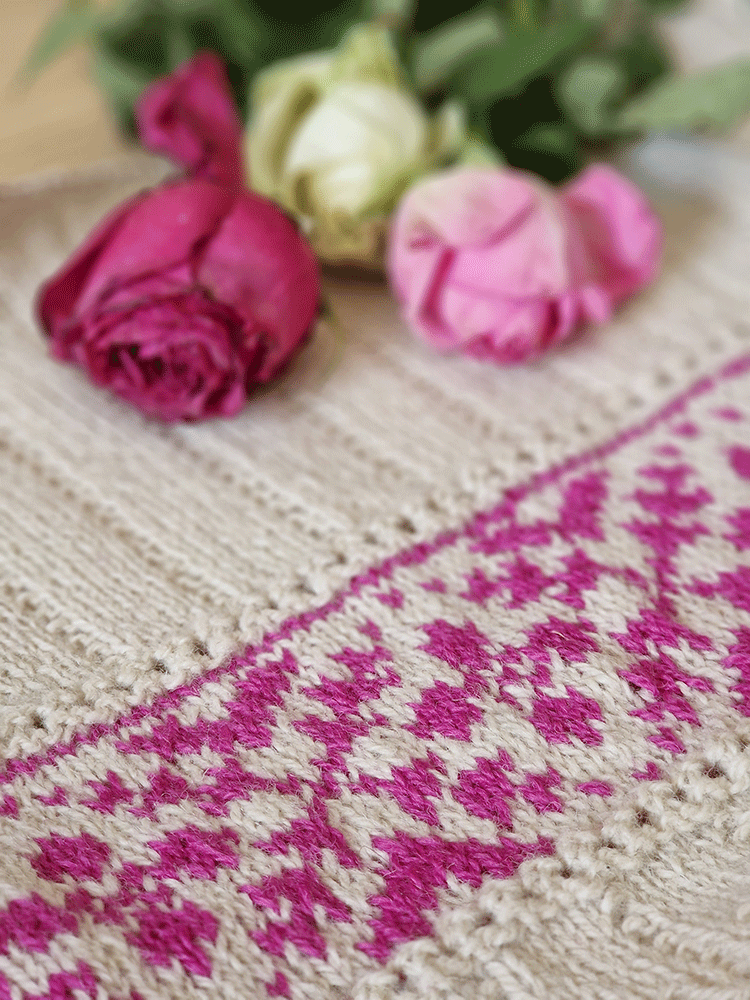
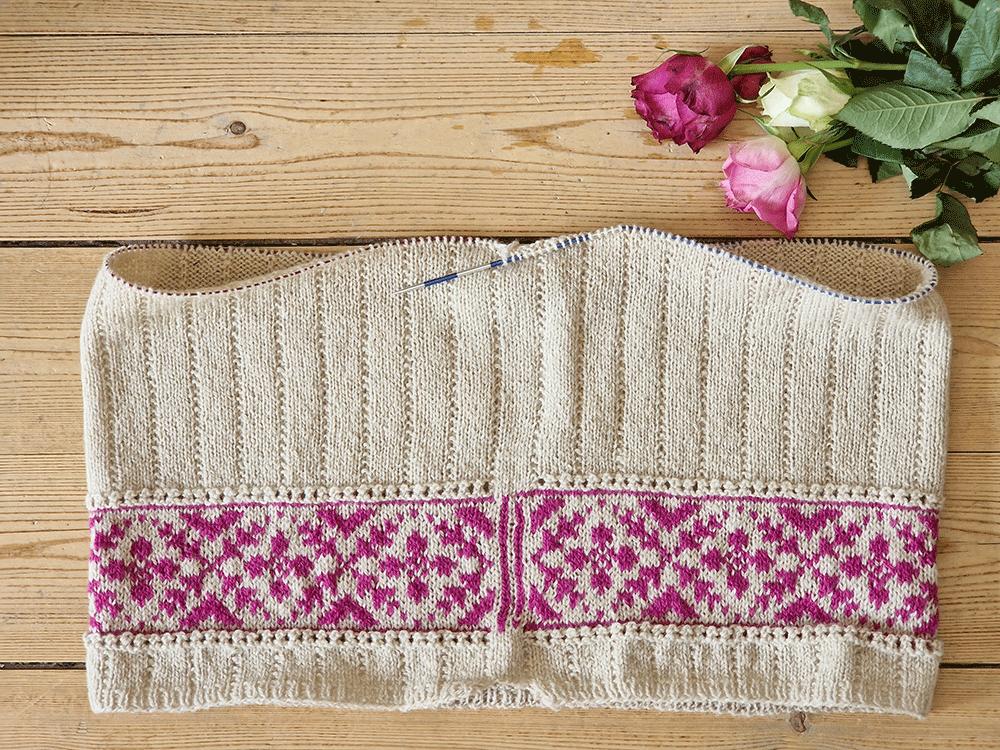
After the ribbing is finished, the piece is joined into a circle so you can continue knitting in the round. It is usual to work color-pattern cardigans this way so you can make a stockinette garment by knitting all the rounds. Two-color stranded knitting with only knit stitches on the right side is easier than purling on the wrong side! Keep in mind that the body of this year’s Summer Cardigan is embellished with vertical stripes that you make by working purl stitches following the instructions. These make a livelier stockinette surface!
STEEK
To make your sweater a cardigan rather than a pullover, it will need to be “opened” at the front with a steek. To make that possible, you will add steek stitches between the two front pieces. The steek stitches are added so later you will have a section that you can cut open without cutting into any of the ordinary parts of the sweater. The Summer Cardigan 2023 has 5 steek stitches. (NOTE These stitches are not included in any stitch counts but are in addition to them.)
CASTING ON NEW STITCHES AS YOU WORK
When I cast on new stitches in the existing knitting, as, for example, steek stitches, I use my double loop cast-on method. By twisting the loop twice, instead of once as for a regular loop cast-on, its firm edge reinforces the work and makes it easier to work on.
Here’s how to make a double-loop cast-on.
EYELET ROW
The two-color pattern panel is framed by purl rounds and an eyelet round. The eyelet round is made with a repetition of *yo, k2tog* (yarnover, knit 2 together).
Make a yarnover: https://youtu.be/81VgACKLGTI
Knit 2 together: https://youtu.be/K_quyn5Zd8M
KNITTING WITH TWO COLORS
Now it’s time to knit the two-color panel.
Read the chart from right to left following the instructions in the pattern.
The strand held nearest the knitted piece is called the pattern or contrast color (= Color 2/CC) and it will be “dominant” in the design (meaning it will be most noticeable). The strand held away from the knitting is called the background or main color (Color 1/MC) and provides the background of the design (it will not be as obvious as the dominant color). Remember that the CC runs below and the MC above on the wrong side! It is important to hold the two strands consistently throughout for good results. In this pattern, Color 2 is dominant.
Tip: If your two-color stranded knitting is tighter than the plain stockinette, go up a needle size!

LENGTHENING THE CARDIGAN
The Summer Cardigan is a cropped, retro-style sweater. If, instead, you prefer a “normal length” cardigan, you can lengthen it in the single-color part of the body by adding 4 in / 10 cm more than the length given in the instructions. In that case, you’ll need 70-100 g more of Color 1.
BINDING OFF FOR THE UNDERARMS
Finally, you will bind off for the underarms following the pattern instructions. See this video for how to bind off the stitches here!

SLEEVES
The sleeves are worked entirely in the round. We begin with a ribbed cuff followed by the eyelet panel as worked on the body.
INCREASES
After the ribbing and eyelet rounds have been worked on the lower edge of the sleeve, you’ll begin increasing to make the sleeve wider and wider.
Increase as here at the beginning of the round and here at the end.
If you find it difficult to keep track of where you increased, I recommend that you count the rounds between the first two increase rounds (corresponding to the number of in / cm given in the pattern). After that, you can count the number of rounds for the placement of the following increases.
You might even mark each increase round with a stitch marker to make extra sure that you’ve counted correctly.
BINDING OFF
After all the increases have been worked, you will continue knitting the sleeve to the length given in the pattern. Of course, you can make the length matching your desired measurements if you prefer a longer or shorter sleeve.
Finally, bind off for the underarm, as you did for the body.
BONUS TIP
Knitting both sleeves at the same time: You can knit both sleeves in tandem, either by using two separate sets of double-pointed needles or the Magic Loop technique (so both sleeves can be worked at the same time on a long circular). Either way, both sleeves will be finished almost simultaneously and you can easily keep track so the increases will be at the same place on each sleeve.

Please show your work on Facebook and Instagram @jarbogarn. Don’t forget to hashtag your post with #sommarkoftan2023