

Summercardigan 2022: part 3
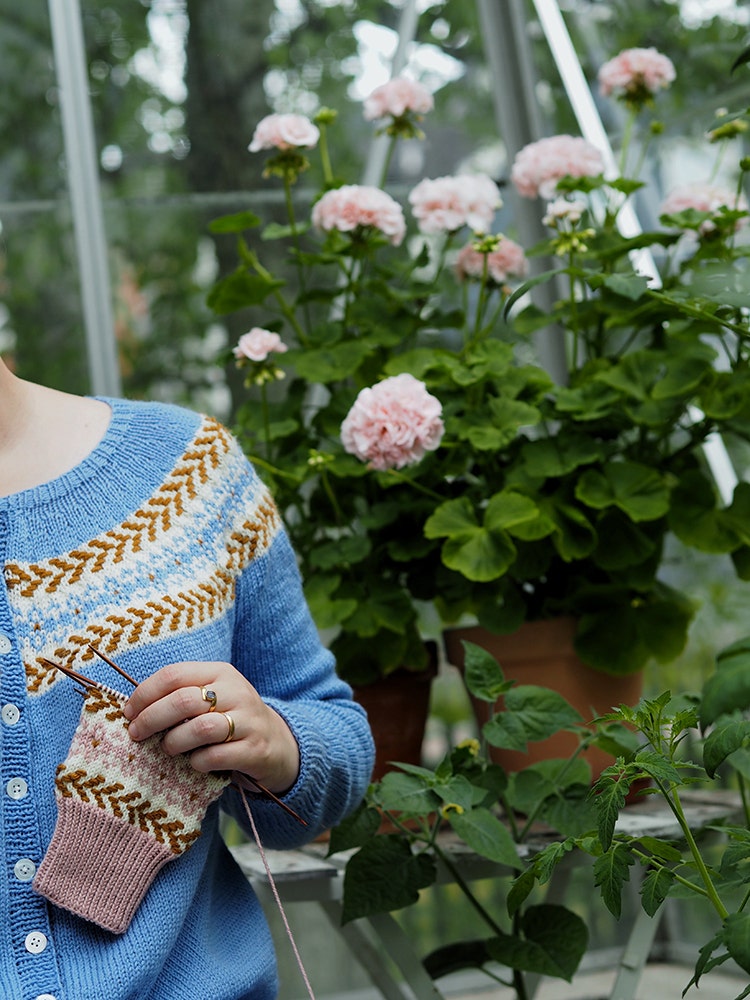
A warm welcome to the third and final part of the Summer Cardigan 2022. This week, we’ll put the fun finishing touches on our cardigan: Front bands for buttons and buttonholes, sewing on buttons, steek finishing, and blocking!
FRONT BANDS
Before your cardigan can be cut open, you’ll knit on the front bands. The bands lock in the stitches up the edge, which makes cutting the steek easier. The center steek stitch stands out more clearly when framed by the bands.
Here’s how to pick up and knit the stitches along the front edges. Video
So the front bands won’t pull in or ruffle, it should be sufficient to pick up and knit 3 stitches for every 4 rows. This means that you skip over approximately every fourth row when picking up stitches. At the beginning and end of the row (when you are picking up stitches in the ribbing), you can pick up and knit 1 stitch in every row so that the band ends are not too tight.
Now follow the pattern instructions for the front bands. Don’t forget to make buttonholes on the right band!
REINFORCING THE STEEK AND CUTTING IT OPEN
When the front and neck bands are finished, it’s time to cut the front of the cardigan open. First, prepare the cutting line by sewing reinforcement seams on each side of the center steek stitch.
Sewing reinforcement seams:
I always sew my reinforcement seams by hand with regular sewing thread and a sewing needle. That way, I have good control over the knitted fabric, which means that I can avoid pulling on the structure or wrinkling it in some way. Sewing by hand gives me a flexible and correctly placed seam, in a way that’s easy and neat.
Sew your seams like this, using BACK STITCH. Video
Cutting the steek open:
Once the reinforcement seams are in place, it’s time to cut the cardigan open.
Work as follows:
Place the cardigan on a flat surface where you have space for moving it around easily.
Use sharp, fine hand scissors for cutting.
Work slowly and methodically when you cut so you have control over what you are doing.
Let your left hand (or right hand if you are left-handed) follow along and provide support as you cut. Cut up the cardigan by following the line in the middle of the center stitch!
TIP If you want to keep the front pieces and back separate from each other as you cut, place the sweater on an ironing board. (Place the sweater on the ironing board so the lower edge of ribbing is at about the middle of the board and the neckband down where the board narrows.) This way, you’ll have a naturally flat surface to work on.
Follow this link to see how to cut up the cardigan: Video
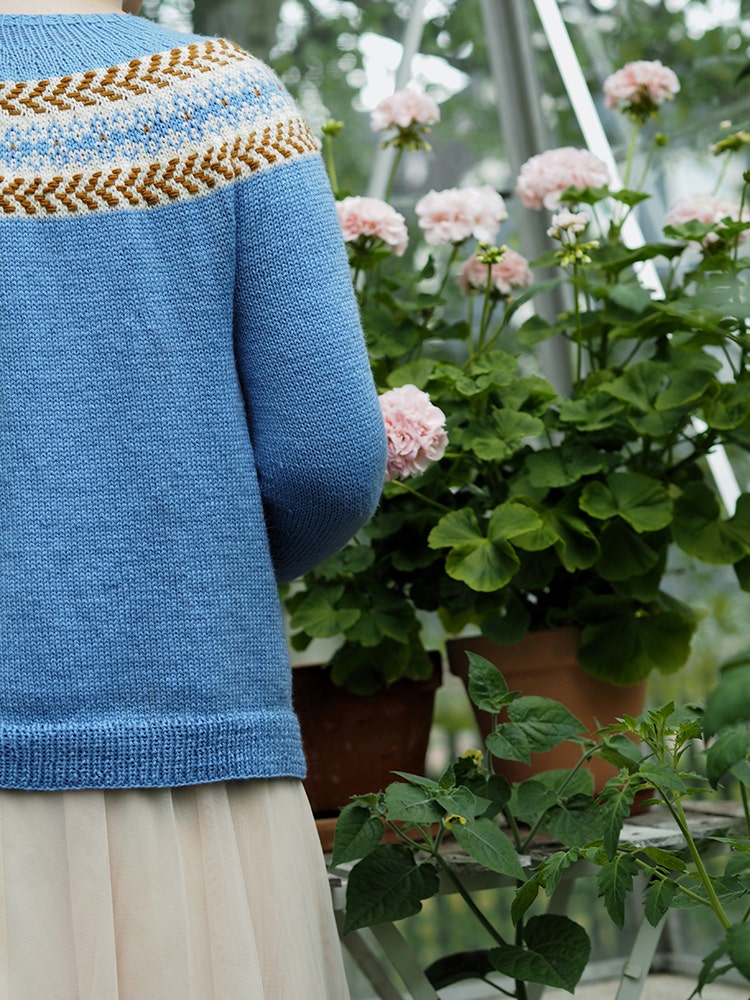
FINISHING
Weave in all the ends neatly on the wrong side. Wet-block the cardigan, gently squeeze out excess water and then pat out sweater to finished measurements on a flat surface. See photo guide on blocking: Video
Finally, sew on the buttons, matching spacing of buttonholes.
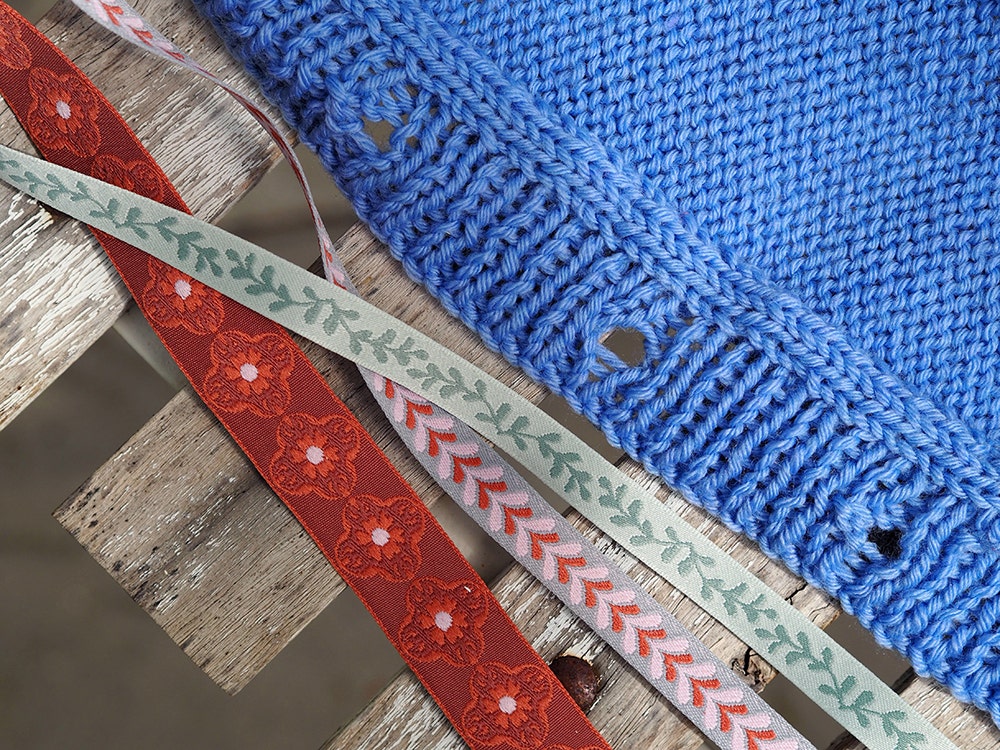
The cut steek edges will roll up towards the inside of your cardigan so you can either sew them down towards the back, using yarn, a tapestry needle and small, discrete whip stitches. Or, cover each cut edge by sewing a pretty ribbon over it.
If you sewing ribbon over the band edges, it is important that both edges are the same length, so neither of the edges sticks out more than the other when the ribbon is sewn on. First of all, the ribbon should be cut in two equal lengths. Measure the length of the cut edges, holding the edges slightly stretched. Then add ¾ in / 2 cm seam allowance to each end (a total of 1½ in / 4 cm).
Pin both ribbons on the inside of the cardigan so they cover the cut edges and then fold them double over each end. Sew the ribbon down with needle and thread using small, discrete stitches throughout.
A huge thank you for participating in this summer’s KAL with Järbo! Please share your results by posting a picture of your finished cardigan on social media and tagging with #sommarkoften2022! We are so curious about just what your cardigan became!
Warm summer greetings from Maja and Järbo!
IMPORTANT LINKS
Go to MATERIALS, where you can read more about the cardigan sizing and which materials are needed
Go to the KAL BLOG PAGE for links to ordering yarn and notions for the Knit-Along
Psst! Join our Facebook group Sommarkoftan – where we’ll share photos, tips and inspiration.
Post your work on Facebook and Instagram (@jarbogarn). Don’t forget the hashtag for your post with #sommarkoftan 2022