

Summer cardigan - Part 1
Hello and welcome to part 1 of the Summer Cardigan KAL (knit-a-long)!
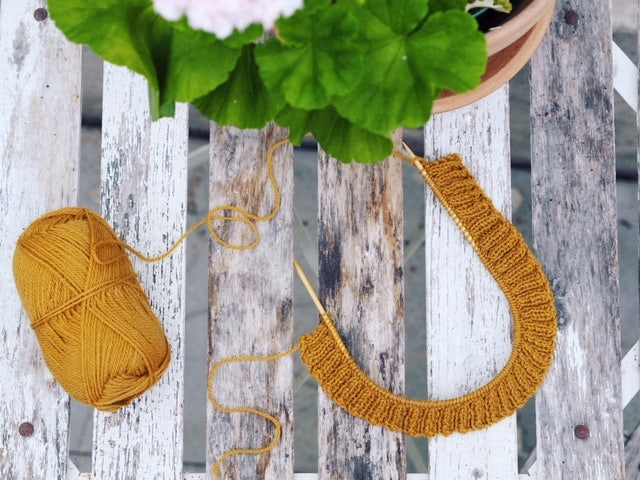
This week we get underway by starting with the stranded colorwork yoke. Just think how much fun it will be finally loop the delightful Kambgarn around your needles.
As preparation for beginning, you should already have taken your measurements, chosen your size, and knit a gauge swatch to make sure that your gauge matches the gauge listed in the pattern. Have you done all that? Good – now we’re ready to get going!
Casting on
Cast on with the classic long-tail cast-on, the method which, I would guess, is the one you learned in beginning knitting class.
Ribbing
The ribbing for the neckband is worked back and forth, as indicated in the pattern instructions. There is an edge stitch at each side = 1 knit stitch at the outer edge of each right side row. For that reason, each row begins with 3 of the same stitch. Later on, when finishing the sweater, you’ll pick up and knit stitches in the edge stitch at each side for the front bands.
Knitting in the round
Once you’ve completed the ribbed neckband, you’ll join the stitches to knit in the round. It is very common to work in the round when making colorwork cardigans so you can produce a smooth stockinette surface on the right side, knitting every round. Stranded-color patterning produced by knitting every round on the right side is easier than purling in pattern on the wrong side.
Steek
So that your garment will be a cardigan rather than a pullover sweater, you’ll need to allow for an opening at the center front. To make space for the opening, you’ll cast on the so-called “steek” stitches between the two front pieces. The steek stitches serve as a “bridge” which we can later cut open without disturbing the regular part of the sweater. The Summer Cardigan has 5 steek stitches that are divided with 3 stitches cast on before working the left front and 2 stitches after the right front. So, there are a total of 5 steek stitches centered between the two front pieces.
On a single color round, the steek stitches are worked with the working yarn for that round. When the round has two-color patterning, the steek stitches are worked in the color sequence shown on the chart below.

NOTE! In this pattern, the steek stitches are included in the total stitch counts to make it easier to correctly count the stitches on the needle! (This is not always the case for all patterns, but, I decided to include the steek stitches to facilitate the stitch counting and to help you ensure that your stitch count is correct).
Casting on new stitches within the garment
When I cast on new stitches in an on-going part of the garment, for example, the steek stitches, I normally use a technique I call double loop cast-on. Twisting the loop twice, instead of once as for regular backwards loop cast-on, produces a firm and consistent base that is easy to work with.
In addition, I think it makes it easier to pick up and knit new stitches on the edge, something we’ll do later when, for example, we pick up new stitches along an underarm cast-on.
Once you’ve cast on the first 3 steek stitches, knit them and then continue in pattern. Do the same with the 2 steek stitches that are cast on at the beginning of the next row.
Latvian braid
A Latvian braid consists of 3 rows/rounds. For round 1, just follow the pattern instructions.
Rounds 2 and 3 can be a bit tricky, especially the first time you try, so we’ve included a video below for each round. You’ll also find a descriptive text for these pattern rounds. As you are working around, tug slightly at each new stitch as I show in the video. That will make the braid more even! Here’s one more tip: as you work round 2, the yarns will twist around each other. You do not need to untwist the yarn. Just be patient, and, on round 3, the strands will untwist as you work.
Round 2:
Round 3:
Yoke
Don’t forget to change the needle size after you’ve completed the ribbing and the Latvian braid!
Increases and the increase rounds
So that the yoke will be shaped proportionally, you’ll work some evenly-spaced increase rounds. Each increase is worked with an invisible increase technique, the right-lifted increase or RLI. The video shows how to make this increase. The pattern also includes an illustration for the technique. Keep in mind that step 2 of the increase involves knitting the stitch already on the needle (the regular knit stitch)! However, that stitch is not counted when counting the stitches between increases.
Technique Tip: Think about the underlying stitch when increasing into it. Work into it carefully so that you don’t tighten or loosen it unnecessarily. Just ease the yarn through the stitch. That way the increases will be even and invisible!
It is important that the increases are spaced evenly so the yoke will be shaped nicely over the shoulders! To help you space the increases as evenly as possible, I’ve included a table with the increase rounds for each size. Read more about the increase table below!
Also note that increases are NEVER made within the 5 steek stitches!
How to use the increase table
To help you space the increases evenly around, I’ve included an Increase Table at the end of the pattern. This is a service for anyone who finds it difficult to calculate how to space increases evenly over a round with many stitches. The increase table tells you exactly how to work the stitches around the increase round, depending on which size you are knitting. Although you don’t work any increases into the steek, the steek stitches are included in the totals on the increase table! That way you don’t have to add them in yourself but can, instead, just follow the table straight off.
Two-color stranded knitting
Now it’s time to knit the colorwork on the yoke (Chart A). It is important for you to follow the instructions for setting up the pattern for your size so the pattern will be centered and symmetrically placed for the front bands.
If you know that you knit more tightly in stranded knitting than in plain stockinette, I recommend that you use one U. S. size larger or one-half size larger metric needle (or more if necessary) while knitting the colorwork. Of course, you’ll need to make sure your pattern knitting is at the correct gauge, so, make a gauge swatch before you start to knit!
Here’s a little extra insert specifically dealing with how to knit a pattern with two colors! Please take a look at it.
Part 1 of the Summer Cardigan ends when we reach the section, DIVIDE SWEATER FOR BODY AND SLEEVES. We’ll get to that step in part 2 of our KAL!
I wish you the best of luck with your cardigan knitting! If you have any questions, feel free to ask them below or in our collective Facebook group “Summer Cardigan.”
PS: Check out our Facebook group, Summer Cardigan/Sommarkoftan – you’ll find pictures, tips, and inspiration. Also, please share your work on Facebook and Instagram (@jarbogarn). Don’t forget to include the hashtag #summercardigan / #sommarkoftan.